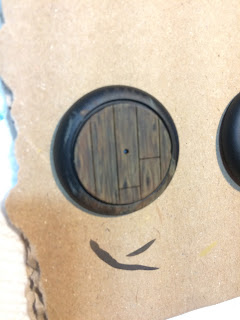
After I shared this model (Sakana from Steamforged Games) I
had a lot of requests for a tutorial about how I painted the wood base. Your
wish is my command!

Here is a video version of the tutorial and a written version follows. :)
I used the hardwood plank base inserts from Deathray Designs
[LINK]. They need to be lightly sanded and washed well before priming. You can
also fill in the indentation with green stuff and sand it flat if you want (I
have done that before), but then you also have to paint in the plank edges, and
it can be tricky to get all of the sizes consistent.
I primed the bases black and will be using four colors from
the Scale 75 paint line [two from their basic line and two from their Fantasy
& Games line]. However, you can use any colors from any manufacturer you
want. You need two browns, a tan/beige/bone color, and black.
Note that the last brown (in this case Brown Leather) is the
most important color. It should be a brown that you know will work well with
the colors for the model you are painting. For example, I chose Brown Leather
because I used that color to base Sakana’s pants, it’s in the mixture for his
hair and other leather bits, etc. If I had chosen a different brown (like a
purple-ish brown or a gray brown) it might not have meshed as well at the end.
For the basecoat I thinned down Bosh Chestnut and tested its
consistency using a scrap piece of paper. I want the paint to be pretty thin
(but not too thin) so that it will give me some nice streaks.


I loaded my brush and painted using the side of the brush,
holding the brush perpendicular to the direction of the planks and brushing in
the direction of the planks. When the first layer dried it gave me some nice
streaking which is the start of the wood grain.
I then did the same thing with a second layer of the bosh chestnut.
Next, I thinned down some Iroko with water and tested its
consistency.
I repeated the previous technique with Iroko, but I had a
little less paint on my brush this time so I could better control it (and the
Iroko is not quite as thin as the Bosh Chestnut was). If you do this right, you
will just get streaky, uneven paint coverage over the entire surface that looks
like the start of some amazing wood grain. Don’t try to cover every bit of
surface, and stop whenever you’re happy with the look.
Now, with some well-thinned black...
...and with only a tiny bit
of paint on my brush, I painted some knots (about 3-5 per base) in locations
that seemed “natural” given the streaks from the Iroko. I then took some of the
Iroko and a liner brush and sketched a few more definitive lines approaching
and curving around the knots to make the grain a little more convincing.
We’re almost done! [Isn’t this fun? :-) ] I mixed up a
glaze of Leather Brown using 50/50 paint and P3 Mixing Medium, then added some
water. You can just use water if you want, but the mixing medium (or any brand
of matte medium) helps hold the paint together when you really thin it down.
Just experiment and see what works for you.
It's important to keep these glazes from "pooling". After doing the glaze, use a damp clean brush and brush towards the outside of the base to remove excess glaze.
After the first coat of glaze I painted some very thin black
lines following the grain pattern using well-thinned black paint. This helped
to redefine a little bit of the darker colors in the wood grain and broke up a
few areas where the Iroko was a bit too solid in its coverage.
I finished with a second coat of glaze, and then I carefully
painted the spaces between the boards with black paint and painted the edges of
the bases black. [Note – if you have flow improver, you can add it to the black
and just “touch” your brush into the cracks and the paint will really run
through the spaces and help you fill them. I didn’t do that because I was too
lazy do dig out my flow improver, but it works well.]
There you have it! Note that you can add visual interest to
a wood floor by subtly shifting the colors in each plank by adding a little bit
of red, green, black, or whatever you want to the glazing color. I did some
Malifaux show girls where I did something like that, and the effect was very
realistic (although I didn't glaze those floors, the concept is the same). This is also an example of filling in the indentation with green stuff, making it smooth, and hand-painting the planks.
I think this works a little bit better with lighter woods because
the difference in tones and hues is more apparent.
Let me know if you liked this and if it helped you. If you
tried painting some wood using this technique, send me a picture – I’d love to
see it!


No comments:
Post a Comment